
It is very simple to Mount Flexible Solar Panels on a Van because flexible solar panels are more durable and portable to attach to any surface. It is very informative news that mounting flexible solar panels on a van is a SIMPLE and most efficient way to generate electricity while traveling in the world in 2026.
It is also very important to note that these lightweight solar panels can easily bend to match the shape of your van’s roof, making them perfect for mobile setups in many nations, like the USA, UK, and China in 2026.
These solar panels help power very necessary tools or devices like lights, fans, and small appliances without relying on external electricity. Installation is simple and does not require heavy mounting structures. You can install your own solar panels and save money.
It is also important to note that flexible solar panels make van life more comfortable, eco-friendly, and independent. Whether for camping or full-time travel, they provide a reliable and clean energy solution wherever you go.
Essential Items and Tools To Mount Flexible Solar Panels on a Van
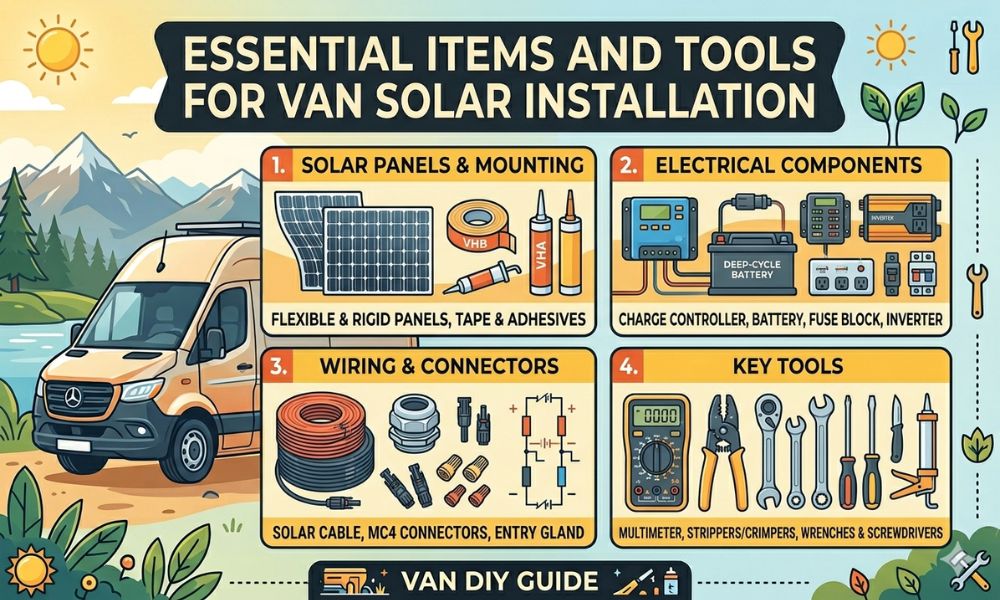
Before starting your flexible solar panel installation on a van roof, it’s important to prepare the right tools and materials. Having everything ready will make the process smooth and efficient. Here’s what you’ll need:
- Flexible solar panels: These lightweight, bendable panels are available in different wattages, sizes, and designs. You can purchase them online or from a nearby hardware store based on your power needs.
- Solar panel mounting kit (optional): A complete kit typically includes a strong adhesive, a waterproof sealant, and the necessary wiring for a secure, durable setup.
You can either choose a mounting kit that matches your panel’s size and brand or build a custom DIY mounting system using suitable components for your van solar setup.
Additional Components and Tools for Van Solar Setup
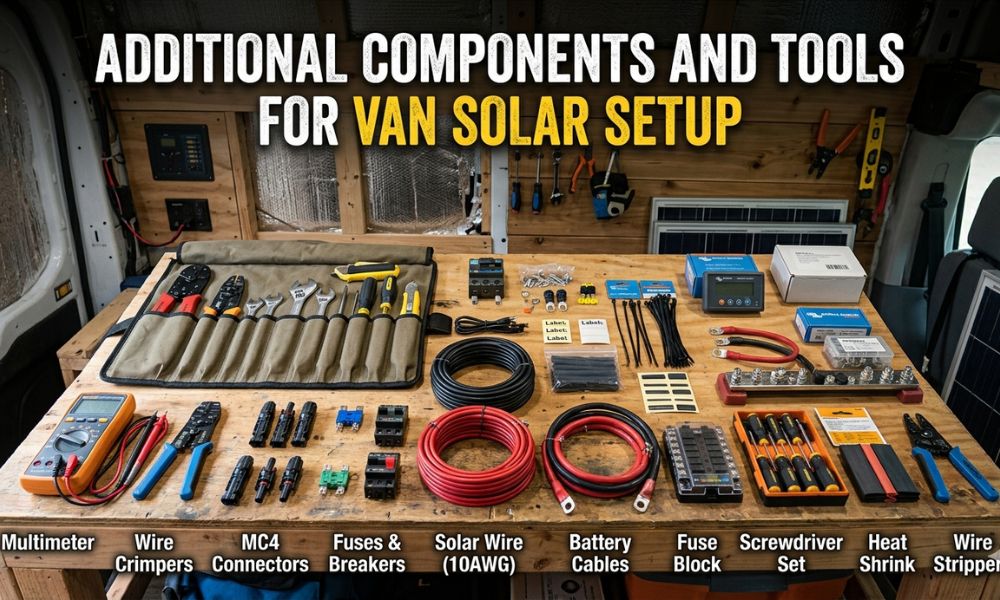
There are also some Additional Components and Tools for the Van Solar Setup, and here we will discuss them one by one as follows. These simple tools will help us to install solar plates on a van with more comfort.
- Adhesive and sealant: Use high-quality adhesive and waterproof sealant to securely attach flexible solar panels to the van roof and protect against water leakage and harsh weather conditions.
- Wiring and connectors: Proper solar wiring is essential to connect the panels with the charge controller, battery, and inverter. MC4 connectors are highly recommended because they are waterproof, dustproof, and easy to connect and disconnect.
- Charge controller: This device regulates the power flow and protects the battery from overcharging, deep discharge, and short circuits. You can choose between a PWM or MPPT charge controller based on your system efficiency needs.
- Battery storage: Solar batteries store the generated energy for later use. Common options include lead-acid and lithium-ion batteries, each offering different performance, lifespan, and cost benefits.
- Inverter: An inverter converts DC power from the battery into AC electricity, making it suitable for running household appliances. You can select a pure sine wave or modified sine wave inverter depending on your power requirements.
- Installation tools: Basic tools like a measuring tape, marker, drill machine, screwdriver, wire stripper, wire cutter, and multimeter are necessary for accurate and safe installation.
Steps for Mounting Flexible Solar Panels on a Van
There are also many easy Steps for Mounting Flexible Solar Panels on a Van, and here we will discuss them one by one with some detail as follows.

1. Plan the Layout and Measure the Roof
Start by carefully planning where your flexible solar panels will be placed on the van roof. Measure the available space and consider obstacles like vents, fans, or roof racks. Make sure the panels will receive maximum sunlight without shading.
Proper layout planning improves energy output and ensures efficient use of space. Mark the positions using a marker so you have a clear guide before installation begins.
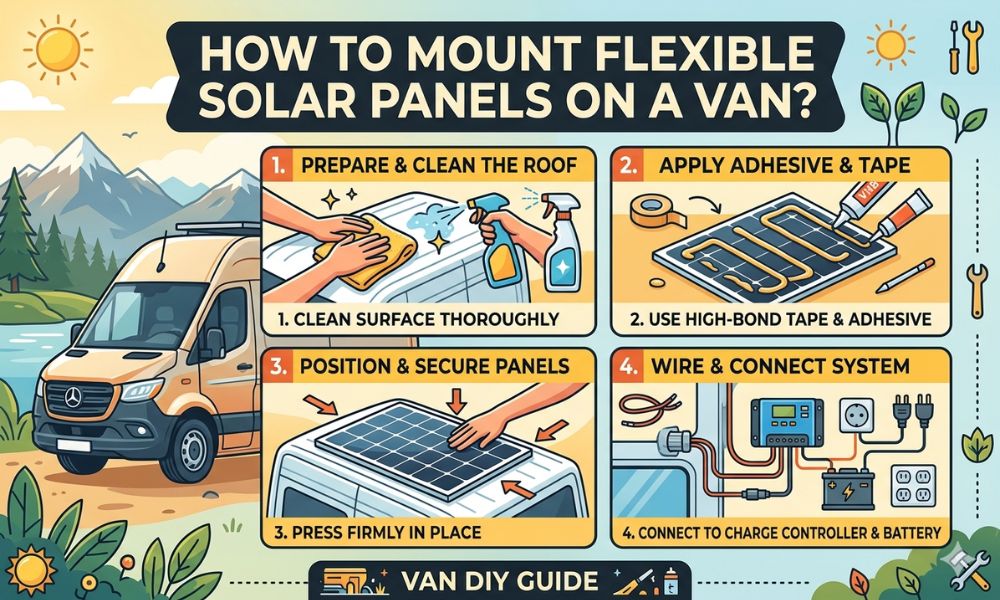
2. Clean and Prepare the Roof Surface
Before mounting, thoroughly clean the van roof to remove dust, dirt, oil, or debris. A clean surface ensures strong adhesion and long-lasting installation. Use a mild cleaner and let the surface dry completely.
Also, inspect the roof for cracks or damage and repair them if necessary. Proper surface preparation is essential for a secure and waterproof solar setup.
3. Position and Test Fit the Panels
Place the flexible solar panels in the marked positions without fixing them permanently. This “dry fit” helps you confirm alignment, spacing, and cable routing. Check that the panels sit flat and match the roof shape properly.
Make adjustments if needed before applying adhesive. This step prevents mistakes and ensures a neat, professional installation.
4. Apply Adhesive and Mount the Panels
Apply a strong, weather-resistant adhesive evenly on the back of the solar panels or directly on the roof. Carefully place the panels in position and press them firmly to ensure full contact.
Avoid air gaps, as they can weaken the bond over time. Some installers also use sealant around the edges for extra protection against water and dust.
5. Seal the Edges for Waterproofing
Once the panels are mounted, apply a waterproof sealant around the edges. This step protects your van roof from water leaks, especially during rain or washing.
Proper sealing also increases durability and prevents dust or moisture from getting underneath the panels.
6. Connect the Wiring System
Next, connect the solar panels using proper wiring and MC4 connectors. Route the cables safely into the van through a cable entry point. Inside the van, connect the panels to the charge controller, then to the battery, and finally to the inverter.
Make sure all connections are tight, secure, and properly insulated to avoid power loss or electrical hazards.
7. Install the Charge Controller, Battery, and Inverter
Set up the charge controller near the battery to regulate voltage and protect the system. Connect the battery to store solar energy, and install the inverter to convert DC power into usable AC electricity.
Ensure proper ventilation and safe placement of all components for long-term performance and safety.
8. Test the System and Final Check
After installation, test the entire solar system to ensure everything is working correctly. Check voltage levels, connections, and power output using a multimeter.
Make sure the panels are charging the battery properly, and the inverter is running your devices smoothly. Do a final inspection to confirm everything is secure and ready for use.
9. Maintain and Monitor Performance
Regular maintenance is important to keep your van’s solar system efficient. Clean the panels periodically to remove dust and dirt, which can reduce performance.
Monitor battery levels and system output to ensure everything runs smoothly. With proper care, your flexible solar panels will provide reliable power for years.
Advantages of Using Flexible Solar Panels on a Van
There are also many Advantages of Using Flexible Solar Panels on a Van, and here we will discuss them in some detail as follows.
Roof-friendly setup: Reduces the risk of roof damage since installation is simple and non-invasive, perfect for DIY solar systems.
Lightweight and low-profile design: Flexible solar panels are thin and add very little weight to your van, reducing wind resistance and helping maintain better fuel efficiency.
Perfect for travel and off-grid living: Their lightweight nature puts less strain on the van roof, making them ideal for long journeys and independent power setups.
Flexible and bendable structure: These panels can easily fit curved or uneven surfaces, allowing installation on van roofs where rigid panels may not work.
Highly versatile: Suitable for tight spaces and custom van builds, giving you more freedom in design and placement.
Durable and vibration-resistant: Built to handle road vibrations, minor impacts, and harsh weather conditions, making them reliable for mobile use.
Easy installation: No need for heavy mounting brackets or drilling—panels can be attached using adhesive, sealant, or strong double-sided tape.
Final words
It is very simple to Mount Flexible Solar Panels on a Van because flexible solar panels are more durable and portable to attach to any surface.
It is very informative news that mounting flexible solar panels on a van is a SIMPLE and most efficient way to generate electricity while traveling in the world in 2026.
It is also very important to note that these lightweight solar panels can easily bend to match the shape of your van’s roof, making them perfect for mobile setups in many nations, like the USA, UK, and China in 2026.